Oh, boy! All you lovely folks who follow our PCAGOE challenges every month are in for a real treat with our next challenge. May's theme is "History/Historical Event", and the members outdid themselves with their entries. Wow! Aren't they gorgeous? And so diverse! I am so proud of all of them, and the fact that they are all so different. Some members chose to portray an historical event or time in a humorous way, others turned a personal memory or family event into an appropriate entry, and others are profoundly moving and commemorate events which affected the course of world events. I wish I could vote for them all for 1st place. Fantastic job, fellow PCAGOE members! My hat is off to you!
Vote for your top 3 favorites at our team website at www.pcagoe.com between May 1 and May 7, 2010. Five lucky voters, chosen at random, will also win one of the beautiful polymer clay items created by our talented member artists.
1) Fly Me To The Moon Pendant by BeeTreeByMe
Mary Ellen's description of her entry: "My inspiration is July 20, 1969, MAN WALKS ON THE MOON! I watched live coverage on my black and white TV. Every kid wanted to be an astronaut! The Space-age inspired, awed and humbled us. This is my tribute to people who made dreams come true."
2) Australian ANZAC Slouch Hat Brooch by Polyclarific
Amanda's description of her entry: "This month we remember our fallen soldiers on ANZAC Day (April 25). We remember fallen Australian and New Zealand Army Corps (ANZAC) who fought at Gallipoli in Turkey during World War II."
3) The Day The World Changed Forever by NKDesigns
Linda'w description of her entry: "On 9/11/2001, 2973 innocent people perished in a horrendous act of terrorism at the World Trade Center. Living in New York, this is very close to my heart. This tin will not be for sale in my shop. It sits on my desk to remind me of the Day the World Changed Forever. Inside the tin is a Flag of Honor with tiny names of the 2973 victims of 9-11 who gave their life."
4) Medieval Manuscript Cane Set by ZoeOwyn
Laura's description of her entry: "This set of 4 canes are all based on pieces/design elements that you could find in medaevil illuminated manuscripts. I took a class to the museum to see an exibit, and I fell in love with the little detail work in the illuminations."
5) Headline 1920: U.S. Women Get The Right To Vote! Brooch by SCDiva
This is my entry. It commemorates the ratification and passing of the 19th amendment to the Constitution of the United States, which finally gave women in this country the right to vote in 1920. It also honors the first women in my family who were able to do so, my Great Grandmothers: Caralie Douglas Medlock Stoney, Julia Elizabeth Craft Moseley, Cora Lee Taylor Page and Pezzie Hinson Forrester."
6) My Great Grandmother's Steamer Trunk by ArrowdaleArtStudio
Cindy's description of her entry: "This trunk represents the hard choices all of our great-(?)-grandparents had to make when they left their homes and families - all that they knew, to come to a new life in America. My great-grandparents came in the latter half of the 19th century, along with 33 other families after massive flooding for several along the Rhine left their farms useless. As I think about them packing up what little they probably had left after selling everything to survive, I imagine that final packing must have been so difficult."
7) Ancient Shards Earrings by OneAndOnly
Maria's description of her entry: "These have been made using inspiration from the minoanss in Greece, the palace of Knossos has still some amazing frescoes that were made 1700BC, flowers and the spiral designs are evident in may of the works."
8) Italian-Inspired Terracotta Necklace by YoungCreative
Marie's description of her entry: "Indulge your daydreams of Italy with this bella necklace reminiscent of ancient terracotta pottery. The focal point is a pendant, featuring inset hand-stamped images of Michelangelo’s David beside a map of Italy."
9) Famous Painters of the Renaissance by PolymerClayCreations
Angela's description of her entry: "My choice was this tin with photos of three of the most famous painters and paintings of the Renaissance. Botticeli, Da Vinci and Michelangelo on a tin covered with gold, copper and pearl mokume gane."
10) Sunface Kachina Pendant or Wall Hanging by RenGalSA
Deb's description of her entry: "My entry is a tribute to Native Americans. It is the Hopi Kachina, Sunface. The Sunface Kachina represents warmth, shelter for the old, bright future, and playfulness for the young."
11) Bathtub Gin Bootleggers by AlisonEKurek
Ali's description of her entry: "1920 through 1933 marked a period of decreed alcohol abstinence in the United States. It also marked a period of bootlegging, bath tub gin, gangsters and general upheaval in American society."
12) Caveman's Wheel Pendant by IansCafe
Ian's description of his entry: "You can't talk history of modern invention without a homage to the birth of the wheel."
13) Come To The Tea Party by AshPaints
Arlene's description of her entry: "Not a political statement, just a reminder of one of the turning points in American history when patriots joined together to fight oppression."
14) Popular Toys of the 20th Century by BlessedBeadJewelry
Janice's description of her entry: "All of these toys, the crayons, the lincoln logs, Raggedy Ann, the teddy bear, Mr. Potato Head, and the Slinky were invented before after 1900 but before 1960! Mr. Potato Head was the latest one, in the early 1950's."
The prize pool for May:
First Row, L-R: Barrette by Polyclarific, Covered Tin by ClayCenter, Bracelet by YoungCreative, Necklace by ArrowdaleArtStudio.
Second Row, L-R: Bracelet by HiGirls, Necklace by 11BoldStreet, Earrings by PolymerClayCreations, Earrings by ClayHappy.
Third Row, L-R: Pendant by JKollmann, Pendant by NKDesigns, Pendant by SCDiva, Charm by JenCom72.
Fourth Row, L-R: Pendant by BeeTreeByMe, Pendant by RiverValleyDesign, Pendant by LaurelSteven, Raw polymer clay cane by ToniNZ
Wednesday, April 28, 2010
Tuesday, April 27, 2010
"Add A Bead" Necklaces - Polymer Clay Style!
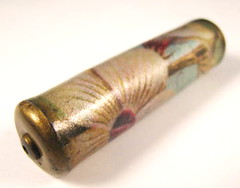
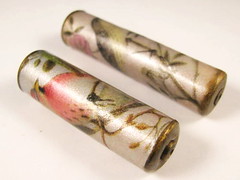
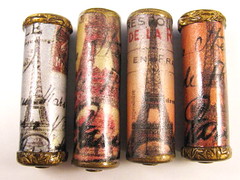
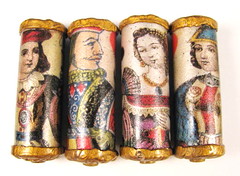
Perfecting my cylinder beads has been an ongoing process for several months, but I think I can finally say I've done it.
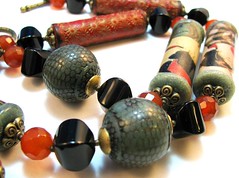
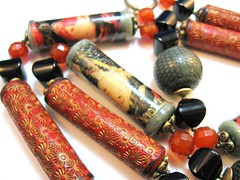
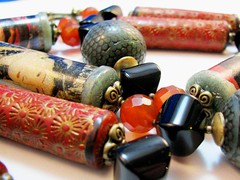
I had a blast this past weekend, creating upwards of 70 new cylinder beads, grouped together according to a common theme they share or the fact that they are from the same digital collection.
My customers have been asking me to make more focal beads and smaller beads to compliment my pendants; and I got the idea several weeks ago to offer collections of cylinder beads and other shapes one at a time, or maybe two at a time, so that my customers could add a bead or two at a time to a collection, eventually having enough to make an entire necklace, the "add-a-bead" theory popularized by Pandora enthusiasts. Remember the 80s when you'd buy one, round gold or sterling silver or platinum bead at a time and add it to your basic bracelet or necklace? Same concept, but in clay. I think it could be a really terrific chance for people to collect my work who might not be able to swing a purchase of 6 cylinder beads at one time, plus it opens up a whole bunch of new ideas about mixing and matching themes and collections in one necklace.
I will be making round beads and rice beads and other shapes in complimentary colors and image transfers. Interest in the concept has grown since I mentioned it to a few of my local and internet customers, and I am very excited about the idea.
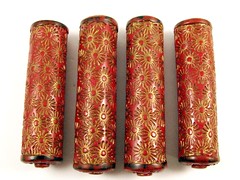
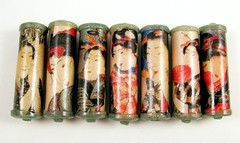
I wanted to show you a few of my favorites from the cylinder beads I made this past weekend. I promise I won't inundate you with all of them, but these are the ones that I would have a hard time selling or giving away. I may have to start collecting my own beads!
Wednesday, April 21, 2010
Up, Up and Away Treasury Feature
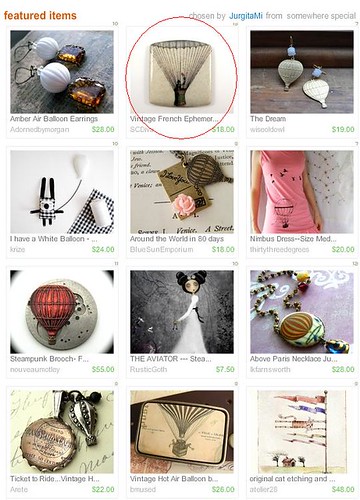
My Vintage French Ephemera Hot Air Balloonist Pendant is featured today in a new Etsy treasury! This wonderfully romantic treasury titled Up, Up and Away! was created by Lithuania's JurgitaMi, a very talented lady who creates the most gorgeous, sumptuous felted wool and natural silk shawls and scarves I have ever seen! I hope you will visit her Etsy shop, JumiFelt. You will see just what I mean.
Here is just one of Jurgita's many creations, The Dream Of Corals. Isn't it just stunning?
Thank you so much, Jergita!
Friday, April 16, 2010
IPCA's 2010 Progress and Possibilities Competition
As my friend Linda Riopel would say, WOO HOO! My Entry is done, the photo uploaded and the application completed!
I had hoped to submit 3 necklaces or 2 necklaces and a brooch showcasing my multiple layer image transfer technqiue, but although I only managed to get one necklace completed, I am okay with that because I have been in "the zone" since Tuesday afternoon at 1:00 (thanks for the time off, boss!) trying to create a suitable entry for the International Polymer Clay Associations's 2010 Progress and Possibilities competition before the deadline tonight.
I have been a member of the IPCA since last August, so this is my first P&P, although I have drooled over photographs of the 2008 finalists and winners since I joined. For the first time, three skill level categories will be implemented: Beginner, Intermediate and Professional.
I started with an idea, that I wanted to incorporate my favorite polymer clay techniques: Image Transfer, Faux and Stamping/Embossing. I also knew I wanted to include my signature cylinder beads, some in image transfer and some stamped, and some of my faux jade.
I can't draw a stick, so I won't show you my initial sketch, but the sketch and the finished necklace are almost identical.
I hope no one minds, but I have posted a bunch of photos. You only get to upload one to P&P, and this was such a long necklace, almost 34", that I couldn't get a really closeup photo of the entire piece, so I am making up for that here!
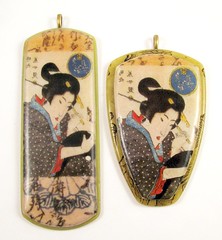
In addition to my favorite techniques, I also wanted to include my favorite colors, red, blue and black. As anyone who knows me knows, I LOVE red, all shades and tones of red, as well as blue and black. I especially love the tertiary colors on the color wheel, tomato red, teal blue, mustard yellow, olive green. I knew just which images to use, too. These vintage Asian images of Geishas, depicting "a day in the life", so to speak, are gorgeous and colorful, graceful and elegant. The lightbulb came on and I started sketching.
Voila! The finished design! I am really proud of this one. I think it is my best work to date, a rich, sensuous, color-drenched, classic configuration which celebrates a cultural heritage steeped in mystery and intrigue. Regardless of the outcome of the competition, I am completely satisfied with it, a first for me, and would not change a thing about it.
Monday, April 12, 2010
Polymer Pasta, Anyone?
I had so much fun this weekend, after finally getting my tax stuff together and dropping it in my accountant's lap at 9:05 a.m. Friday, I was free as a bird until this morning and was determined to let my creativity loose and play with my clay all weekend.
I recently received some encouragement to enter the International Polymer Clay Association's 2010 "Progress and Possibilities" event, and after much debate with myself and the extra encouragement of a few of my good PCAGOE friends, I have decided to go for it. I am planning to enter 2 necklaces and a decorative item, but they have to be submitted by April 16th! Yikes!
I sat down with a gallon of sweet iced tea, my drug of choice for energy and prepared to just "let go". I was in a really good frame of mind and the ideas just started coming one after another.
I can do a lot with a little clay. I never throw away the smallest scrap. It gets used somehow, and these little tube beads were the result of playing around with a tiny scrap and some new rubber stamps. I love this little nubby impression.
Now I'm not saying these will end up in any of my entries, but I had a ton of fun making them. And for some reason, they look like pasta to me, so I dubbed them "Polymer Pasta."
"... stuck a feather in his hat and called it macaroni... Yankee Doodle hmmm hmmm hmm, Yankee Doodle Dandy..." Hee Hee
Thursday, April 8, 2010
Congratulations To The Winners!
The winners of the April PCAGOE challenge were announced this morning. Congratulations to all our winners! Fantastic examples of the diversity of clay and a showcase of the talent we have in our guild. I'm so proud! Thanks to everyone who entered and everyone who voted!
Winners of the Public Vote:
1st - VyaKyasha
2nd - BeeTreeByMe
3rd - PhoenixRose
Winners of the Member Vote:
1st - BeeTreeByMe
2nd - PhoenixRose
3rd - PolymerClayCreations
I hope you'll join in the fun again next month. Our theme for May is "History/Historical Events." Wow, I can't wait. I've got tons of ideas for an entry!
Wednesday, April 7, 2010
My Bonnie Plaid Scottish Rose Necklace is Featured in a New Etsy Treasury! Happy Tartan Week!
What a nice surprise to wake up to this morning! I received an email from RedHenStudios that she included my little Bonnie Plaid Scottish Rose Necklace, one of my favorite designs, in her new Etsy Treasury Tartan Week, celebrating the 12th Annual New York Tartan Parade on April 12. What a great idea! I didn't know about the parade before the email, but I'll definitely add my Scottish surnames to the mix!
Ironically, I actually have that book featured in the Treasury, The Clans and Tartans of Scotland by Robert Bain. It's a pocket-sized, fascinating little book filled with the most gorgeous graphics of clan tartans if anyone is interested in Scottish history or genealogy like I am.
You can read more about Tartan Week here, at the official Tartan Week website.
Thanks again, RedHen, and here is a salute to my Scottish forebearers and all my Crawford, Peeples, Wallace, McKie, Paul and McCreary/MacQuarrie kin
O Scotia! my dear, my native soil!
For whom my warmest wish to heaven is sent;
Long may thy hardy sons of rustic toil
Be blest with health, and peace, and sweet content.
Robert Burns
Monday, April 5, 2010
Practice Makes Perfect - If I Do Say So Myself!
I practiced my small work more over the past couple of days, Easter service and cooking for 10 notwithstanding, and think I now have a handle on making small beads. The more confident I got, the more I winged it, and they did get a little fatter as a result.
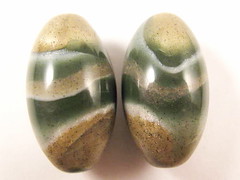
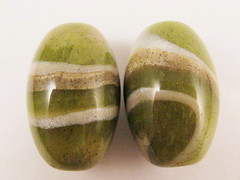
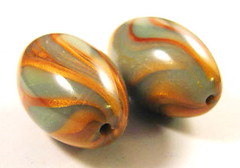
I really like how the faux agates turned out, and the Blue and Green batch. These were some of the bigger ones, which I plan to sell in pairs but which could also be used by themselves as a focal bead pendant. My friend and fellow PCAGOE member Jenny of Jencom72 must have liked them, too. She featured them on her blog yesterday! Thanks again, Jenny!
All the beads shown above were made with translucent clay, alcohol inks and embossing powder. That's it, nothing else.
All of the beads shown below had a little extra opaque Turquoise and Ecru clay, but the majority of the recipe is still translucent, alcohol ink, and embossing powder, even the red. These are for me, I'm not planning to sell them. I love the Southwestern colors and plan to make myself a few things with them. Selfish me, but I think I deserve a reward for all this practicing.
I hope everyone enjoyed a happy Easter or Passover. It was a glorious, sunny, joyful day I spent with family, the best kind of holiday.
Saturday, April 3, 2010
AHA! Moment Number Three
I was back at it this morning, trying new small beads in different shapes. I still couldn't go near that 10mm sized round bead, but I did make some passable 25mm rounds. I also made some 3/4" square beads.
I cheated a bit with these, though. Somebody needs to invent a square bead roller. I resorted to covering clear, Lucite beads I bought in a moment of weakness last year. They were in the "trash 'em" box until I looked at them with new eyes last night. Another Aha! moment.
The 25mm round beads started out life as plain, unglazed, white bisque beads. Hey, where there's a will, there's a way, and all that.
Friday, April 2, 2010
An AHA Moment...Or Two
I have never liked making small beads because my OCD tendancies come out in full force when I try. I can never get the beads the same, exact size. That is a must for me. It would nag at me until I would end up destroying them if beads of a series didn't match perfectly. Another thing is that the holes always look ratty, and then there is the amount of sanding and buffing it takes to make them nice and pretty. All of you who know me know that I would have to sand and buff every one, and my fingers would be a bloody mess after finishing a bunch of 10mm round beads!
Several people have asked me lately to make small beads to match my pendants, so I need to try and figure out a way to make them and stay sane. Well, last night I had one of those "lightbulb-over-the-head", Aha! moments.
I realized I needed a better way of deciding how much clay to put in the bead roller (yes, a bead roller. Even I am not crazy enough to try to roll these by hand!) to get the same sized beads.
When I first started working with polymer clay three years ago, I bought every tool and gadget there was on the market, thinking I needed them all to be able to do anything. Most of them have never been used other than an initial trial run. Some of them I've sent on to better homes, some of them, frankly, I trashed in a "what was I thinking" Spring cleaning last year.
For my pendants, I work primarily with my stiff blade and two 1/8" thick plexiglas sheets, one 3"x6" and one 3"x3". I use the plexiglas sheets to smooth and refine the shapes.
The bead rollers, which I bought in every shape, have been sitting and gathering dust for 3 years. I can't even find the little skewer thingies you are supposed to use to make the holes. Who knows where they are.
Anyway, I picked an oval bead roller that makes beads about 1 1/2" tall and 1" in diameter. I figured I could handle that size in the sanding and buffing phase.
I used some scrap clay, rolled a snake and marked and cut it into sections. I put one section in the roller, but it wasn't big enough, so I smushed two together and put them in the roller. Yay! Good size, it rolled to nice little points on both ends, nice shape. Now, what to make the holes with? I never did find the little skewers, so I used a needle tool. Run it halfway through on one end, turn the bead around and go halfway through the other end, simple. Of course not. My nice, rice-shaped pointy-ended bead looks like a barrel, a misshapen pear of a barrel at that. I try making and rolling another, using the same sized "section" of clay. Not only was it a different size (how did that happen?), it was a different shape after I made the holes.
So I had two things to figure out: Why aren't my beads the same size and how can I make a hole that won't destroy the shape of the bead?
First problem was solved when I threw out the notched marker tool. I rolled a sheet of clay through the pasta machine at the thickest setting and use shape cutters to figure out how much clay I need for each bead. I am sure everyone who is reading this is saying "what an idiot, it's been done that way since the beginning of time practically", but it just now occured to me. I'm a bit slow on the uptake.
Anyway, I used a 1 1/2" circle cutter and two pieces of clay cut from a 3/4" circle cutter, which turned out to be exactly the right amount of clay for the oval bead roller.
The second problem of how to make perfect holes actually solved itself. I put the beads back through the roller and tried the needle tool again. Voila. I didn't have to go all the way through this time, the hole was already there, it just needed a gentle, little poke at each end. Nice, perfect little holes. Ah, bliss.
I think this says something about me, something deep I am probably not smart enough to comprehend, something about why I always make things hard on myself when there is a simple, easy solution that I refuse to see staring me right in the face? Yeah, I know. We are always hardest on ourselves, aren't we? But I like it that way, it makes the end result even more satisfying, and I learn lots of good stuff on the journey.
Now I don't hate small work so much, but I still don't know about those 10mm beads. We'll see.
Subscribe to:
Posts (Atom)